
I had my first shellac manicure a couple of years ago and fell in love with it. A manicure that lasts 2 weeks with no chipping? Sign me up! I was pretty excited about it, until I realized that I hate spending my money on things like manicures and pedicures. Don't get me wrong, I love them, but I don't like the price. I would much rather buy an article of clothing. Now, in my fantasy world I would have weekly visits to the salon for all kinds of fancy thing. But alas, I am stuck in reality.
I discovered that you can buy the special nail lamps needed for shellac manicures on Amazon, along with all the polish needed. I immediately put the lamp on my Christmas list. My mom gifted me with it and I have had my nails shellac-ed ever since.
If you can paint your nails, then you can give yourself a shellac manicure. It did take me a few times to get the hang of applying thin layers, instead of gooping the polish on my nails. One of the best parts about the shellac manicure is once you are done with all the steps the polish is dry. You don't have to be careful for hours waiting on the polish to dry. No more smudges or dings in the polish.
The up front cost may seem daunting, but when you compare it to basically $50 each visit at the salon it pays for itself pretty quickly.
What you need to purchase:
Lamp
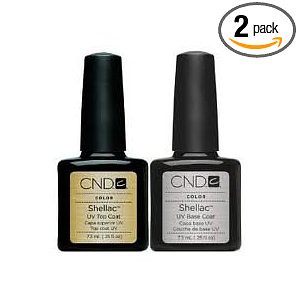
Base Coat
Top Coat
Color
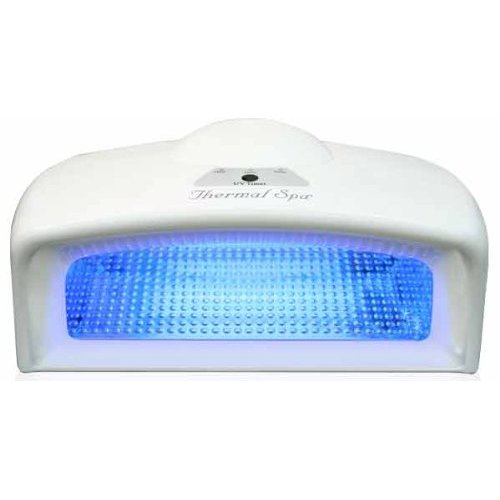
I like this lamp because it has three different timing settings, so you do not have to keep track of the time yourself. You can also fit both hands inside at the same time.
I use the CND brand of polish, and it can be bought on Amazon.
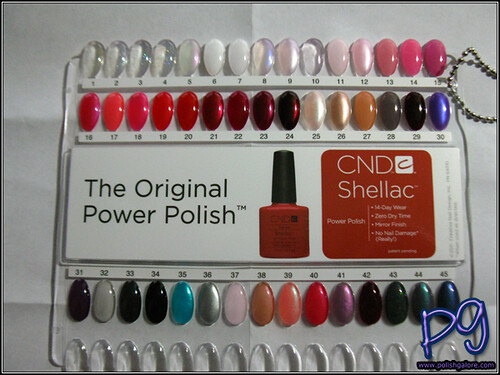
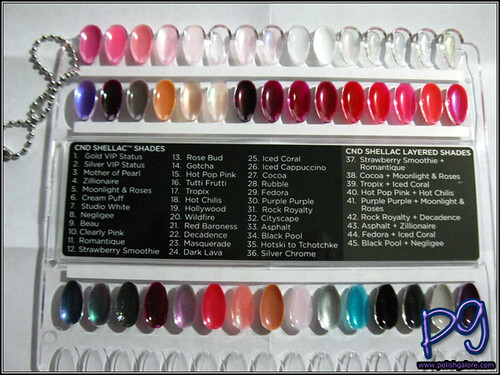
It can be difficult to pick out colors. I found this color chart on Polish Galore and it has been helpful.
To remove the polish you must use acetone. The shellac polish is much harder to remove than regular polish. It can strip your nails, but I almost always immediately repolish them. I had my nails shellac-ed continuously for 7 months. My nails are stronger now than they were before I started polishing them all the time. I had pretty brittle nails before and the polish keeps them protected. My 7 month streak stopped when Jack was born and I was lucky to shower. Polishing my nails was not high on my list. :)
Back to removing the polish...I found the best thing to do is cut squares of aluminum foil, tear cotton balls in half, dip the cotton ball in the acetone, then place it on your nail and wrap the square of foil around it. Leave it on for about 10 minutes. I also buy the wooden nail sticks and use that to help remove any stubborn polish.
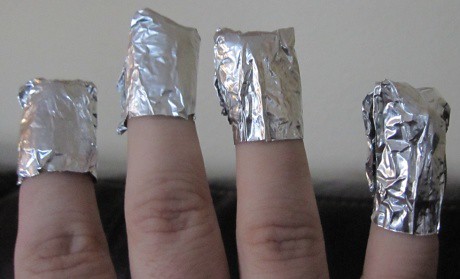
image via google
Shellac manicure steps:
Step 1: File Nails Into Shape
Step 2: Remove Cuticles off of the Nails
Step 3: Apply a Thin Layer of Base Gel
Step 4: Cure Each Hand for 2 Minutes Under the Lamp
Step 5: Apply 1st Layer of Shellac Color (Thin layers work best)
Step 6: Cure Each Hand for 2 Minutes
Step 7: Apply 2nd Layer of Shellac Color (Think layers work best)
Step8: Cure Each Hand for 2 Minutes
Step 9: Apply a Thin Layer of Top Coat
Step 10: Cure Each Hand for 2 Minutes
Step 11: Wipe Each Nail With Alcohol to Remove Sticky Film


This is an awesome post! I've been wondering how the process works - you make it seem totally doable! Thanks for the details - I might be investing in a shellac kit soon.
ReplyDeleteI put a whole kit for this on my Birthday/Christmas list! Fingers crossed!!! Thanks for the post!
ReplyDeleteXO Lucy
This is great and so helpful! Do you know if you can use the OPI brand of shellac polish with this lamp?
ReplyDeleteYou can use any brand of shellac polish with this lamp. I've actually used a friend's OPI shellac polish with my lamp and it worked great.
Delete@ilovethemidwest You can use any brand of shellac polish with this lamp. I've actually used a friend's OPI shellac polish with my lamp and it worked great.
ReplyDeleteThanks!
DeleteLove this post! Might just put this on my Christmas list :)!
ReplyDelete